Setting up L2TP/IPSec access under Windows XP.
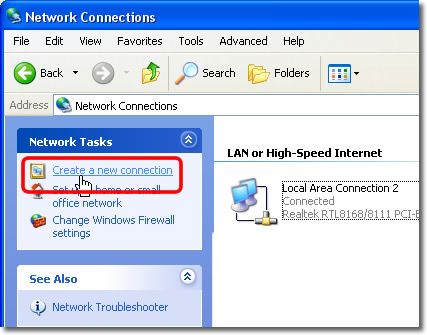
1. Open Network Connections
First, open the ‘Network Connections’ folder by going to the Start Menu and selecting Settings->Network Connections. It may also be located in Settings->Control Panel->Network Connections

2. Create New Connection
Click on the ‘Create a new connection’ in the Network Tasks task pad
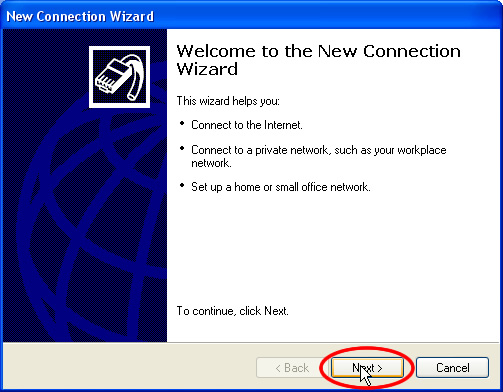
3. Next
Click ‘Next’.
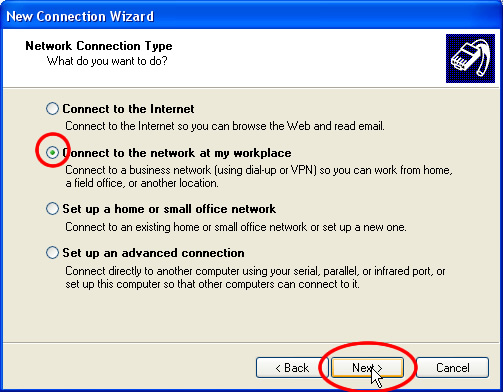
4. Connect to Workplace
Select ‘Connect to the network at my workplace’ and click the ‘Next’ button.
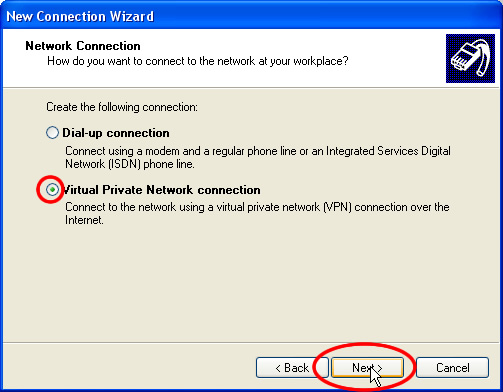
5. VPN
Click ‘Virtual Private Network‘ connection, and then click ‘Next’
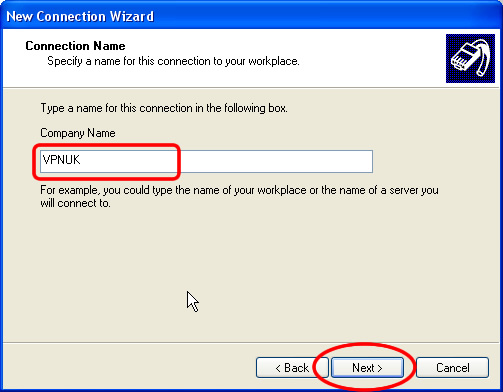
6. Name
Enter the company name
on this screen, type ‘VPNUK’ for the Company Name and click the ‘Next’ button.
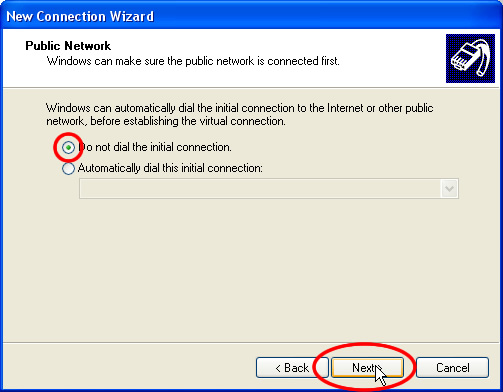
7. Do not dial
Set this option to ‘Do not dial the initial connection‘ and click the ‘Next’ button.
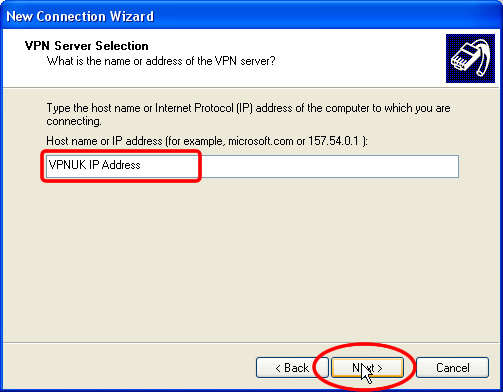
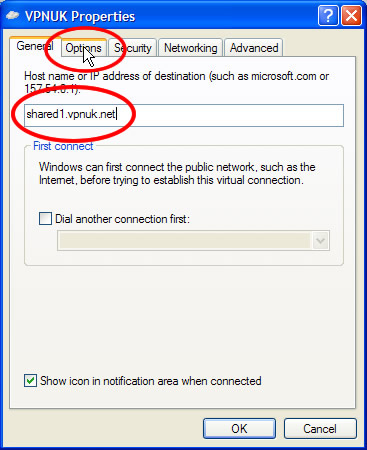
8. VPNUK Server IP
Enter the VPNUK Server ‘IP Address’. You can find the server information in your ‘Welcome to VPNUK’ email or in the ‘Client CP‘ on the VPNUK website.
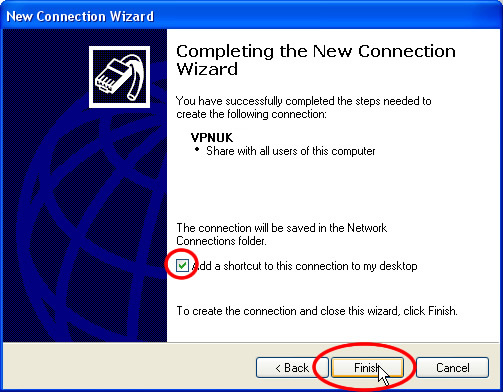
9. Add Shortcut
Click to select the ‘Add a shortcut to this connection to my desktop’ check box and click ‘Finish’.
10. Open Connection
Now return to your desktop and ‘double click’ on the VPNUK connection shortcut we created in part 9
11. Login Details
Enter your login details in the ‘User Name’ and ‘Password’ box. Optionally, click ‘Save Password’, then click ‘Properties’
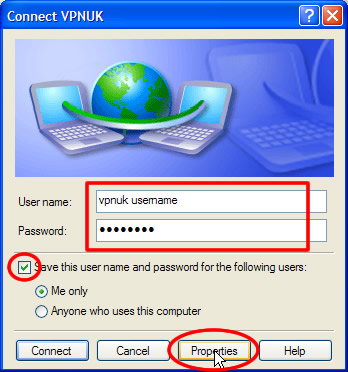
12. IP Address
Ensure the VPNUK ‘IP Address’ is correct, this should be the same as the one we sent you in the ‘Welcome to VPNUK’ email, then click ‘Options’.
13. Windows Logon Domain
Uncheck the ‘Include Windows logon domain’ and click the ‘Networking’ tab.

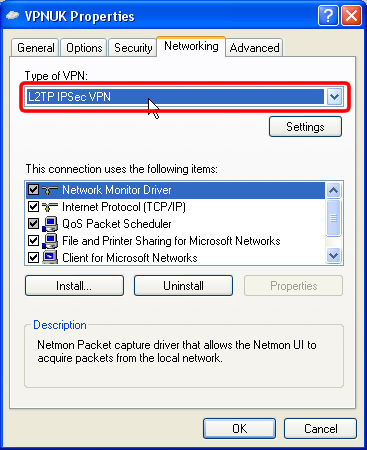
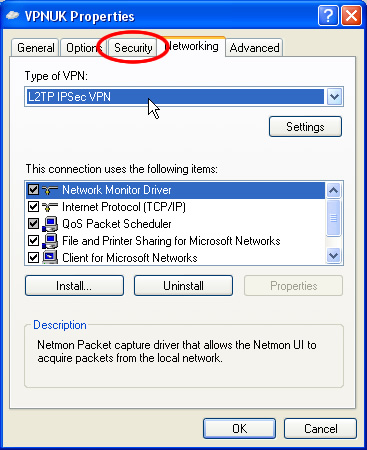
14. Type of VPN
Next click the popup menu and change the ‘Type of VPN’ from ‘Automatic’ to ‘L2TP IPsec VPN’.
15. Security
Click the ‘Security’ tab.
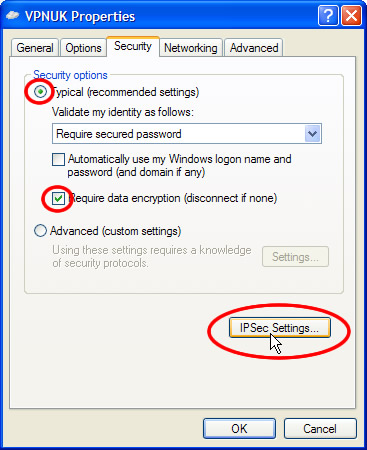
16. Security
Ensure the Security options are set to Typical (recommended settings). Place a tick in the ‘Require data encryption’ box then click the ‘IPsec Setttings…’ button.
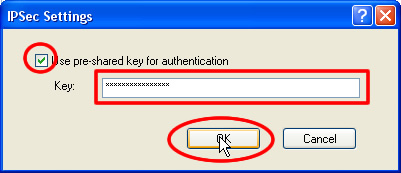
17. IPSec Key
Click the checkbox and type ‘69000903’ as the key and click ‘OK’.
18. Installation Complete. Connecting to the VPN
Go to your desktop and ‘double click’ on the VPNUK connection shortcut.
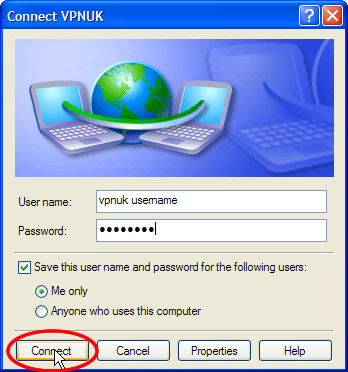
19. Connect
Click onto the ‘Connect’ button.
Troubleshooting Guide
ISP DNS Hijack / DNS Leak Protection
Some ISPs will attempt to hijack your DNS settings which hinders the VPN connection from functioning correctly. If you find that your VPNUK connection does not route your traffic correctly you can try changing your Public DNS server to the VPNUK DNS server or to an alternative like Google DNS.
1. Right click onto your network connection icon in the sys tray and select ‘Network Connections’.
2. Right click onto your active Ethernet or Wireless Connection
and select ‘Properties’.
3. Double click onto ‘TCP/IP’ from the list of items.
4. Enter a DNS IP into the DNS server box. Google DNS is 8.8.8.8. VPNUK Public DNS is: 109.169.6.2