Setting up OpenVPN access on Android devices.
Installing directly to an Android Device
Click Here to download your OpenVPN config files from our server. Our system will automatically email your config file(s) to you or you also have the option to download them manually.
1. Install OpenVPN for Android
Go to the Google Play store on your Android device and download the official ‘OpenVPN for Android‘ app by Arne Schwabe. If you are unable to download from Playstore, you can download OpenVPN for Android from our site here: OpenVPN for Android 0.7.8 .

2. Start Configuration
If you haven’t already configured your connection Click Here to download the pre-configured OpenVPN for Android config files from our server. Our system will automatically email your Config files to you or you also have the option to download them manually.

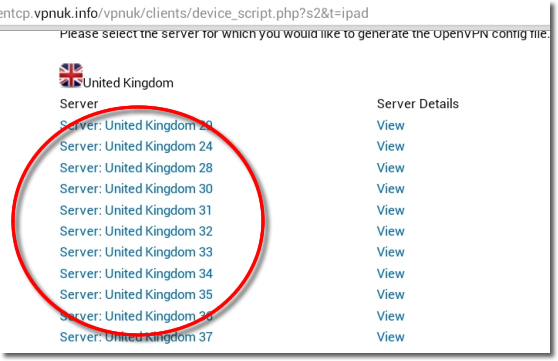
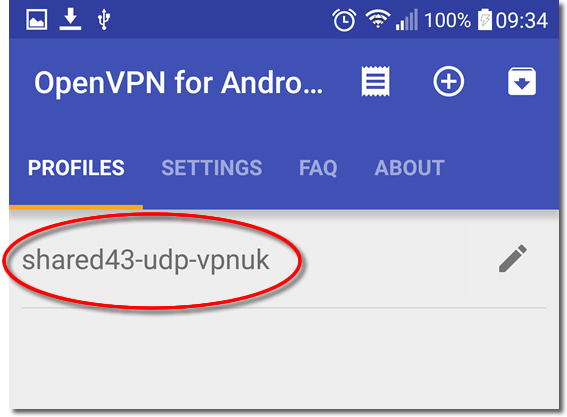
3. Choose a Server
If your account is on the Shared IP platform, you are welcome to choose any or as many servers as you like. If you have a Dedicated IP account your server details will be automatically selected for you.
4. Get the files
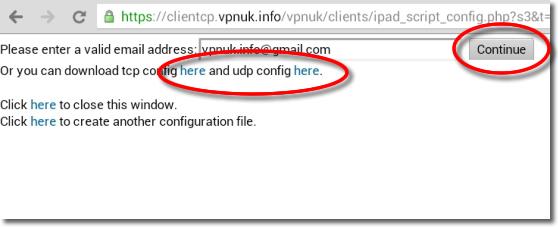
Confirm your email address then click onto the Continue button or download the files manually. The files must be manually saved to the root directory or to a folder located in the root direcotry.
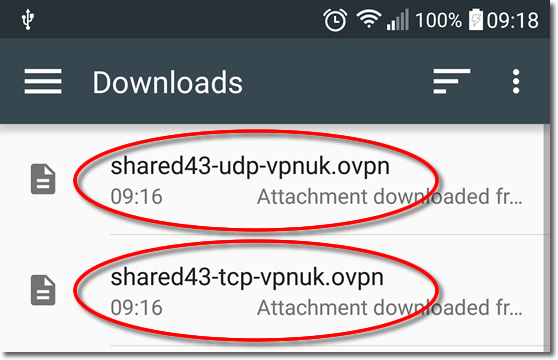
5. Save File(s)
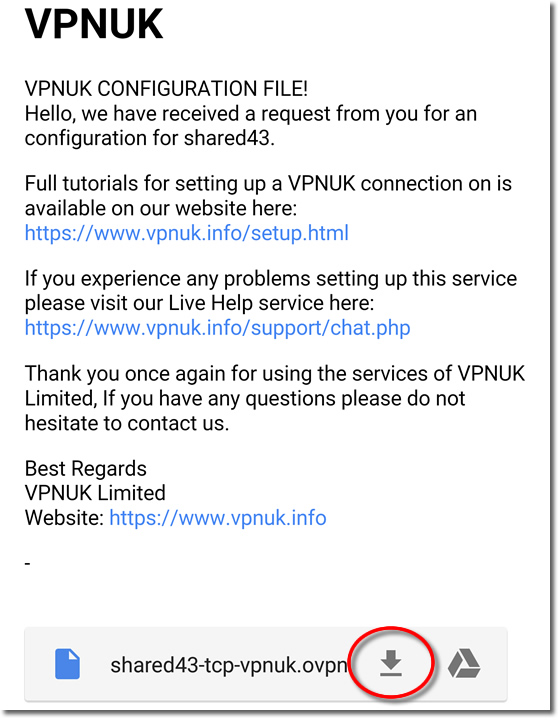
After a couple of minutes an email will arrive from our system. Go to your Android email client and save the file(s) to the root directory. As default they will be saved to the ‘Download’ folder in the root directory.
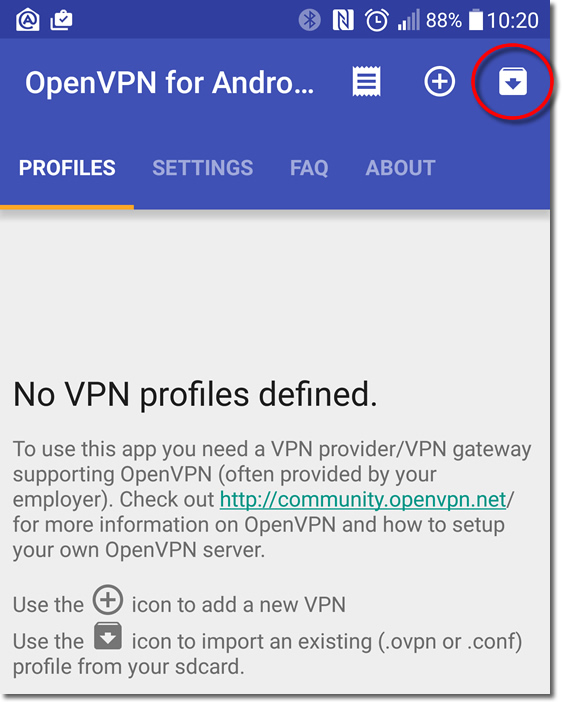
6. Open Application
Go to the OpenVPN for Android application and open it.
7. Import new configuration
Go to ‘Profiles’ and select ‘Import’.
8. Select Configuration file
Click onto one of the ‘.ovpn’ files and then click onto the ‘Select’ button.
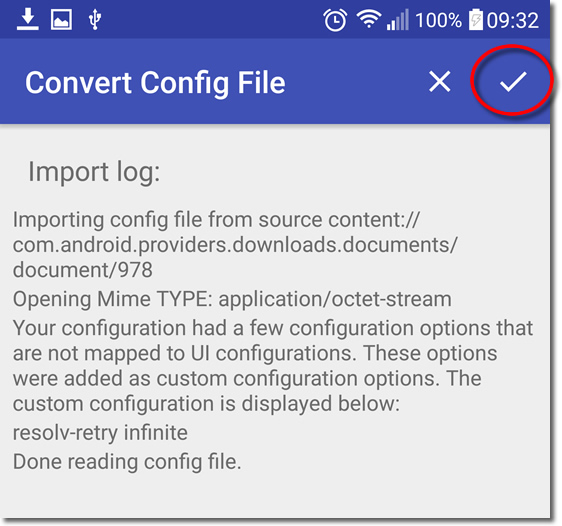
9. Confirm Import
Click the the ‘tick’ icon to confirm the profile import.
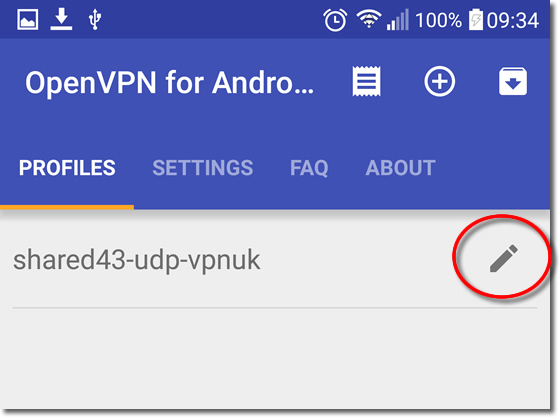
10. Configure Connection
Click onto the ‘edit’ icon.
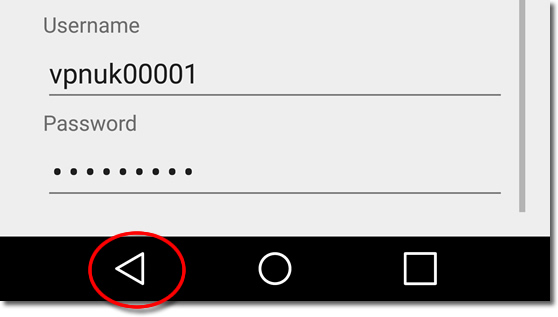
11. Basic Configuration
In order to make the OpenVPN setup procedure as easy as possible for you, we pre-configure the connection settings for you, so you should not normally have to make any changes or add additional settings to your configuration file. All you have to enter is your login ‘username’ and ‘password’. To do this scroll down to the bottom of the basic configuration screen and enter the login details that we sent to you in your ‘Welcome to VPNUK’ email.

12. Save Settings
Once you have entered your login username and password you can click onto the ‘Back’ button in order to return to the ‘Profiles’ overview.
13. Connect to VPNUK
You can now connect to the VPNUK service by clicking onto the connection.
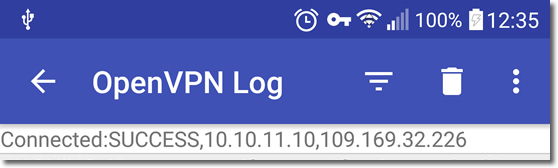
14. Connection Overview
The connection will now initiate and connect you to the VPNUK server. The first time you connect to OpenVPN for Android you may receive a prompt. Check the box labelled ‘I trust this application’ then click ‘OK’.
Troubleshooting Guide
ISP DNS Hijack / DNS Leak Protection
Some ISPs will attempt to hijack your DNS settings which hinders the VPN connection from functioning correctly. If you find that your VPNUK connection does not route your traffic correctly you can try changing your Public DNS server to the VPNUK DNS server or to an alternative like Google DNS.
1. Go to Settings.
2. Go to ‘Wireless and Network’ settings.
3. Go to ‘Wi-Fi’.
4. Click your connection from the list of available networks for a few seconds and select ‘Modify network’ when the option appears.
5. Select the option to ‘Show advanced options’ and ensure the IP Settings dropdown is set to ‘Static’.
6. Change ‘DNS 1’ to the VPNUK Public DNS server: 109.169.6.2 or the Google Public DNS IP address: 8.8.8.8.
7. Thats it!